
Summary
After completing my Breakneck Ridge hike, I was surprised at how remarkably enjoyable solo hiking could be. Tired?… take a break. Hungry?… eat lunch. Lonely?… talk to a stranger. Lost?… nobody there to judge you. Once I realized I didn’t have to be tethered to another human being, I was free to plan to my heart’s content.
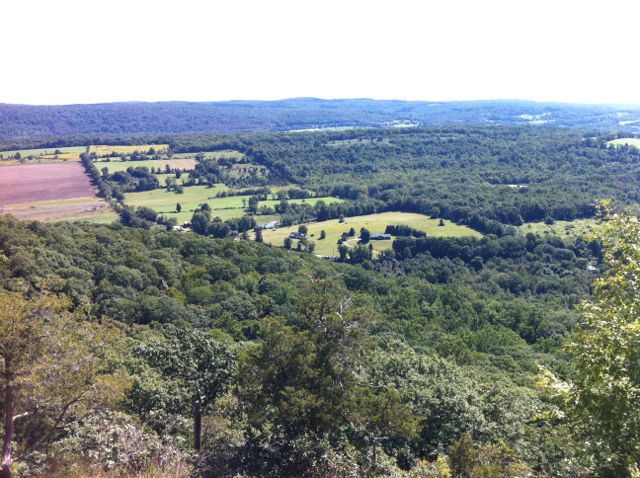
View from the top of West Mountain.
After a little research, I decided on a section hike along the Appalachian Trail to Nuclear Lake. If you’re new to hiking, I highly recommend this trip. It’s an excellent way to escape Manhattan for the day and you don’t even need a car! Plus, I’ve already planned out the details for you, so get out there and start exploring!
You can also check out my Adventures along the Appalachian Trail & Nuclear Lake from my trip in August 2013.
Getting There
By Train
The conveniently named Appalachian Trail Station is located about 2 hours north of Manhattan. To get there, hop on the Harlem Metro-North Line (the one in blue) and it will take you to the Appalachian Trail Station.

My favorite little train station.
You will need to transfer at the Southeast Station, but it is relatively simple and the trains are well timed. The train you are looking for is very old and surprisingly loud, so I sincerely doubt you’ll miss it. If you are concerned, ask a conductor – they are more than happy to help.
There are a few important facts that you should take note of:
- The Harlem Line only stops at the Appalachian Trail Station on Saturdays and Sundays (and holidays)
- Only 4 trains stop at the Appalachian Trail Station each day
- 2 Northbound trains in the AM
- 2 Southbound trains in the PM
- Only the rear doors of the very last car open at the station
- Searching Google Maps for the Appalachian Trail Station will bring up a different station than the one you want (see picture below)

The marker at the top is where Google Maps says that stop is and the red circle is where the stop actually is.
You can check out the MTA website for the most up to date train schedule.
When you arrive at the Appalachian Trail Station, the entrance to the trail is right across the tracks. It will be the one with an elevated wooden platform like the one below – you can’t miss it.

Look for path with the elevated walkway when you arrive at the train station.
By Car
If you are lucky enough to have a car, the drive up should take about an hour and a half. The best place to park is about a quarter of a mile north of the trailhead. There are two small parking lots on either side of the road with plenty of spots to park. If you want exact driving directions here’s a link to Google Maps.
Once you arrive, walk south along Route 22 for a quarter mile and you will see the trailhead (and Appalachian Trail Station) on your right.
The Hike
- Difficulty: 4 / 10
- Distance: ~12 miles (round trip)
- Elevation Gain: ~1,300 feet
- Time: ~7 hours*
The trail itself is easy to navigate. From the Appalachian Trail Station:
- Follow along the white blazes (Appalachian Trail) for ~5 miles
- Turn left onto the yellow blazes (Nuclear Lake Loop)
- Follow the yellow blazes for ~1 mile and turn right when it intersects the white blazes
- Continue along the white blazes for ~6 miles back to the train station

Whoever installed these walkways I owe you a huge thank you!
Below is a map outlining my hike back in September 2013. I highlighted two key areas with particularly good view that are great for taking a break or eating lunch. You can also view the interactive map which contains additional details such as elevation, distance, and speed.

Map of my hike along the Appalachian Trail & Nuclear Lake – August 2013
*the time quoted is for solo hiking; if you’re traveling in a group make sure to add extra time
Getting Home
If you follow the trail above you will end up back at the Appalachian Trail Station where you began. As long as you time out your hike, you should have no issue catching the train back to Grand Central. Before you leave on your trip check the MTA website for the most up to date train schedule back into the city.
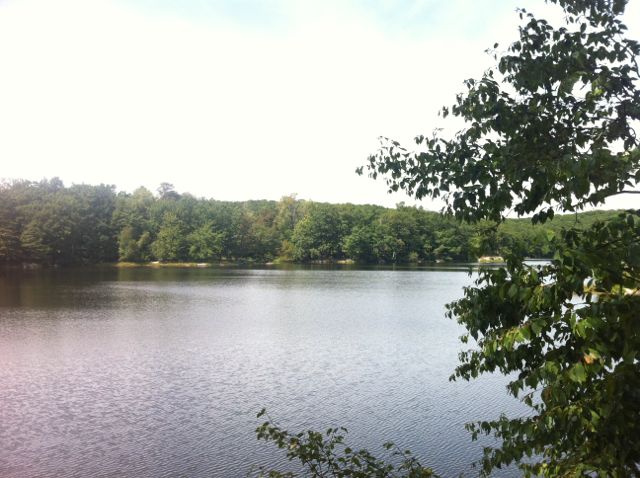
View of Nuclear Lake during my lunchtime break.
Cost
Here is the cost breakdown for my trip in August 2013.
- Round Trip Subway Fare to Grand Central: $5.00
- Round Trip Train Ticket to Appalachian Trail Station: $30.50
- Breakfast at Grand Central: $2.50
- Snacks: $14.75 (1 apple; 6-count box of granola bars; and 6-count bag of bagels, 1 jar of peanut butter)
- Total Cost: $52.75*
Note: this is definitely on the lower side and if you need to buy any hiking equipment or plan on doing other activities during/after the hike you will need to add it to amount quoted above.
*I also brought $40 cash with me just in case.

On the Appalachian trail you’ll see a massive boulder split right down the middle. Impressive, but if you’re claustrophobic I suggest you walk around.
What You Need
Overall you can do this hike with minimal equipment and some common sense. Here’s what I brought on my hike in August 2013:
- Standard Backpack (nothing special, I’ve had it for >6 years)
- Standard Sneakers (Hiking boots are preferable, but not required)
- 2L Camelbak (2+ liters per person is recommended)
- Cell Phone
- Map (printed and on my phone)
- Snacks
- Extra Cash
- Book (Just in case you have to wait by yourself for the trains)
- Bandaids (you never know…)

Interesting little flower along the trail. Looks like a firecracker going off in the sky.
Other Optional Items
- Sunscreen (much of the trail was covered with trees; bring if you burn easily or go hiking during the fall/winter)
- Sunglasses
- Camera (I used my cell phone)
- Compass (If you are prone to getting lost)
Tips & Resources
- Bring at least 2 liters of water per person; even on cool days, you will be surprised how quickly you go through water
- Bring extra snacks if possible, there’s no better way to make new friends 🙂
- Other great resources for information on the Appalachian Trail and Nuclear Lake

Pingback: Adventures on the Appalachian Trail & Nuclear Lake | [just [be] happy]·
Pingback: Return to the Appalachian Trail – 10/5/13 & 10/6/13 | [just [be] happy]·
Pingback: Backpackers Guide to the Appalachian Trail and Ten Mile River Shelter | [just [be] happy]·